> ## Documentation Index
> Fetch the complete documentation index at: https://docs.squadvault.xyz/llms.txt
> Use this file to discover all available pages before exploring further.
# Getting started
> Set up your account, create your organization, and take the first steps that make SquadVault useful for your team.
SquadVault is currently in public beta. You can be productive in a few minutes.
## 1. Create your account
1. Open [squadvault.xyz](https://squadvault.xyz) and sign up or sign in.
2. Register with email, or continue with Discord.
If you sign up with **email**, the onboarding asks you to confirm your **display name** and optionally upload a **profile photo**.
If you sign up with **Discord**, that step is skipped — your name and avatar come from Discord.
You can add a passkey later under **Settings → Account**.
## 2. Create your organization
On the welcome screen, create your organization:
1. Optionally upload an **organization logo**
2. Enter the **name**
3. Confirm the **URL slug** (used in public tryout links like `/apply/{orgSlug}`)
You can skip this and create the organization later from Settings — but most features need an organization first.
## 3. Connect Discord and import your roster
Right after creating the organization, onboarding asks you to connect Discord. Once the server is linked, roster import is two clicks:
1. Confirm which Discord roles are **player** roles and which become **teams** (suggestions are pre-checked when we can guess)
2. **Import roster** — SquadVault creates the teams, syncs players, and maps memberships
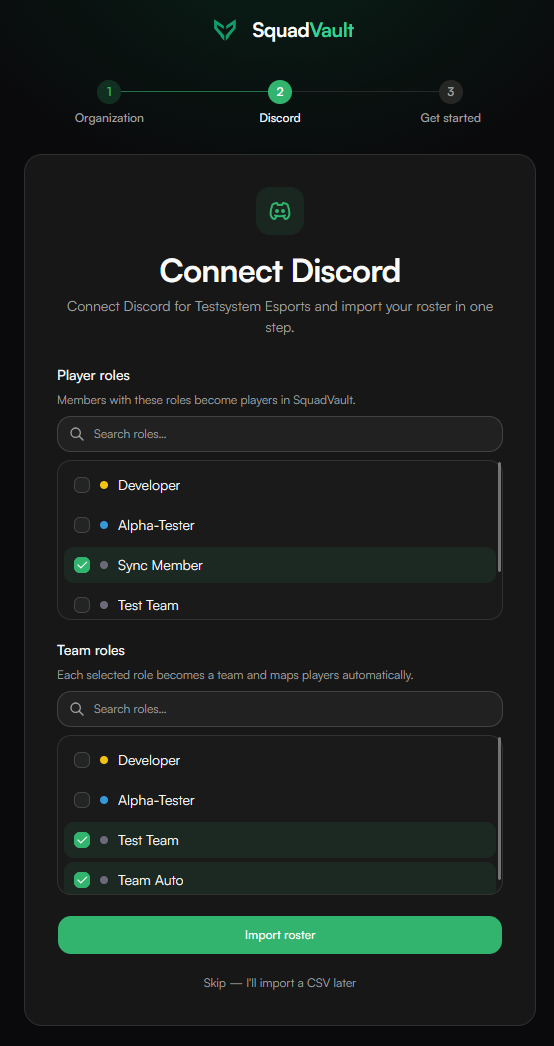 Before that, invite the SquadVault bot and select the server. You can skip import and do it later under **Discord**, or upload a CSV on **Players**. See [Discord](/user-guide/discord).
## 4. Finish setup
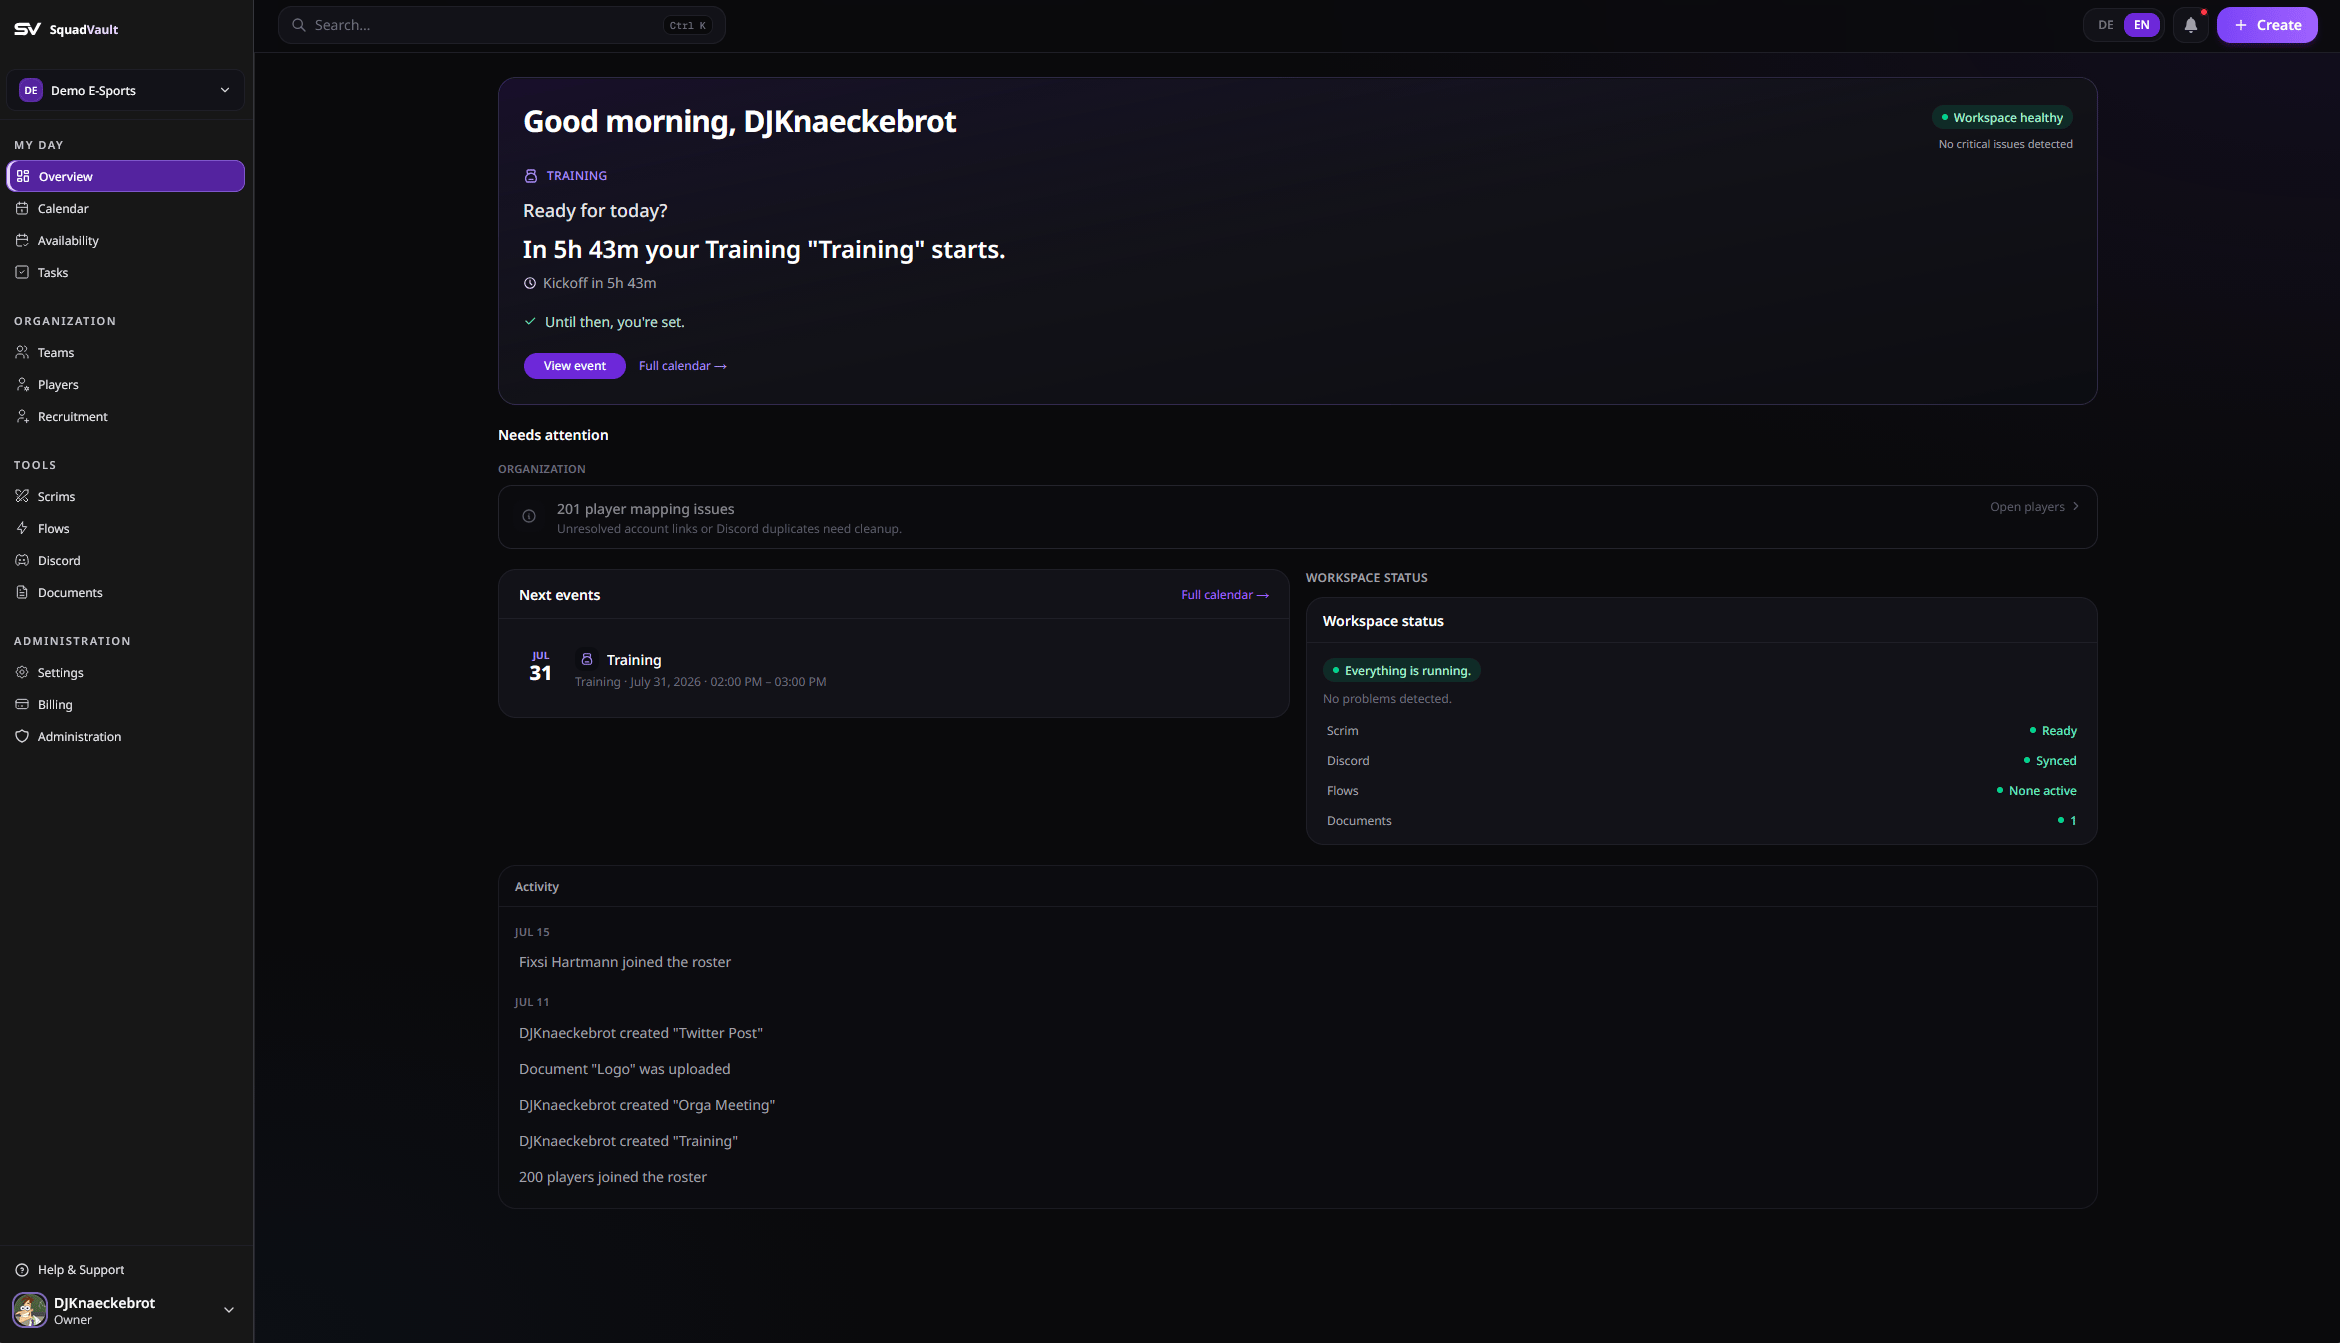
After Discord (or if you skipped), SquadVault suggests two actions:
Open **Settings → Team**, invite people by email, and choose a role. Start with the people who manage the roster day to day.
Open **Flows**, start from a template, and activate it — for example auto-setup when a team is created. See [Flows](/user-guide/flows).
The dashboard also shows a Workspace Setup checklist until you dismiss it.
Before that, invite the SquadVault bot and select the server. You can skip import and do it later under **Discord**, or upload a CSV on **Players**. See [Discord](/user-guide/discord).
## 4. Finish setup
After Discord (or if you skipped), SquadVault suggests two actions:
Open **Settings → Team**, invite people by email, and choose a role. Start with the people who manage the roster day to day.
Open **Flows**, start from a template, and activate it — for example auto-setup when a team is created. See [Flows](/user-guide/flows).
The dashboard also shows a Workspace Setup checklist until you dismiss it.
 ## 5. CSV fallback (if you skipped Discord)
Discord is the default path for a roster with many players and teams. If you skipped it:
1. Prefer going back to **Discord** (or the welcome import) and importing roles as teams and players.
2. Otherwise open **Players → Import CSV**. Required columns: `name` and `gamer_tag` (`Spieler` / `IGN` also work). German Excel semicolon CSVs are supported.
3. Creating players one by one is last — only for a handful of people.
There is no importer from other roster tools for 1.0.
## 6. Plan the week
1. Open **Calendar** and create a scrim, training, meeting, or content event — or import a booked scrim under **Scrims**.
2. Ask players to update **Availability** (weekly slots and event RSVPs).
3. Use the heatmap to schedule when the roster is free.
4. For scrims, finish prep in the [Scrim workspace](/user-guide/scrims).
## Next steps
Invite members and pick the right role for each person.
Mission Control after a scrim is booked.
Keep Discord roles aligned with your roster.
Check connection health for Discord, tags, webhooks, and API keys.
Automate Discord setup and notifications.
Connect bots and scripts when you need them.
Review who changed what (admins).
## 5. CSV fallback (if you skipped Discord)
Discord is the default path for a roster with many players and teams. If you skipped it:
1. Prefer going back to **Discord** (or the welcome import) and importing roles as teams and players.
2. Otherwise open **Players → Import CSV**. Required columns: `name` and `gamer_tag` (`Spieler` / `IGN` also work). German Excel semicolon CSVs are supported.
3. Creating players one by one is last — only for a handful of people.
There is no importer from other roster tools for 1.0.
## 6. Plan the week
1. Open **Calendar** and create a scrim, training, meeting, or content event — or import a booked scrim under **Scrims**.
2. Ask players to update **Availability** (weekly slots and event RSVPs).
3. Use the heatmap to schedule when the roster is free.
4. For scrims, finish prep in the [Scrim workspace](/user-guide/scrims).
## Next steps
Invite members and pick the right role for each person.
Mission Control after a scrim is booked.
Keep Discord roles aligned with your roster.
Check connection health for Discord, tags, webhooks, and API keys.
Automate Discord setup and notifications.
Connect bots and scripts when you need them.
Review who changed what (admins).